Prometheus安装部署
# 规划
| IP | 角色 | 版本 |
|---|---|---|
| 10.10.0.13 | prometheus-server | 2.10 |
| 10.10.0.11 | node_exporter | 0.18.1 |
| 10.10.0.12 | node_exporter | 0.18.1 |
# 下载
官网:https://prometheus.io/download/
[root@prometheus-server ~]# wget https://github.com/prometheus/prometheus/releases/download/v2.40.7/prometheus-2.40.7.linux-amd64.tar.gz
# 创建运行用户
[root@prometheus-server ~]# groupadd -r prometheus
[root@prometheus-server ~]# useradd -r -g prometheus -d / -s /sbin/nologin -c "prometheus user" prometheus
2
# 安装
安装这里介绍两种方式:
1、docker部署
2、二进制部署 (本文采用)
# 二进制部署
[root@prometheus-server ~]# tar -xf prometheus-2.40.7.linux-amd64.tar.gz
[root@prometheus-server ~]# mkdir /etc/prometheus
[root@prometheus-server ~]# mkdir /var/lib/prometheus
[root@prometheus-server ~]# cp prometheus-2.40.7.linux-amd64/prometheus /usr/local/bin/
[root@prometheus-server ~]# cp prometheus-2.40.7.linux-amd64/prometheus.yml /etc/prometheus/
[root@prometheus-server ~]# chown -R prometheus:prometheus /etc/prometheus
[root@prometheus-server ~]# chown -R prometheus:prometheus /var/lib/prometheus/
[root@prometheus-server ~]# vim /usr/lib/systemd/system/prometheus.service
## 配置启动脚本
[Unit]
Description=prometheus
After=network.target
[Service]
Type=simple
User=prometheus
ExecStart=/usr/local/bin/prometheus \
 --config.file=/etc/prometheus/prometheus.yml \
 --storage.tsdb.path=/var/lib/prometheus \
 --storage.tsdb.retention=15d \
 --web.read-timeout=5m \
 --web.max-connections=10 \
 --query.max-concurrency=20 \
 --query.timeout=2m \
 --web.enable-lifecycle
Restart=on-failure
[Install]
WantedBy=multi-user.target
## 启动
[root@prometheus-server ~]# systemctl enable prometheus
[root@prometheus-server ~]# systemctl start prometheus
[root@prometheus-server ~]# netstat -anlptu|grep :9090
tcp        0      0 127.0.0.1:39868         127.0.0.1:9090          ESTABLISHED 3080/prometheus
tcp6       0      0 :::9090                 :::*                    LISTEN      3080/prometheus
tcp6       0      0 ::1:52200               ::1:9090                ESTABLISHED 3080/prometheus
tcp6       0      0 127.0.0.1:9090          127.0.0.1:39868         ESTABLISHED 3080/prometheus
tcp6       0      0 ::1:9090                ::1:52200               ESTABLISHED 3080/prometheus
2
3
4
5
6
7
8
9
10
11
12
13
14
15
16
17
18
19
20
21
22
23
24
25
26
27
28
29
30
31
32
33
34
35
36
- 参数解释:
笔记
--config.file=/etc/prometheus/prometheus.yml ### prometheus配置文件
--storage.tsdb.path=/var/lib/prometheus ### prometheus 存储数据路径
--storage.tsdb.retention=15d ### prometheus采集数据保留时间
--web.read-timeout=5m ### 请求链接的最大等待时间
--web.max-connections=10 ### 最大链接数
--query.max-concurrency=20 ### 最大支持的并发查询量
--query.timeout=2m ### 单个查询超时时间
--web.enable-lifecycle ### 热加载
# docker部署
官方介绍:https://github.com/prometheus/prometheus/tree/master (opens new window)
docker方式部署需要先创建prometheus.yml文件
[root@prometheus-server ~]# mkdir /opt/prometheus/
[root@prometheus-server ~]# vim /opt/prometheus/prometheus.yml
2
# my global config
global:
  scrape_interval:     15s # 抓取数据的周期,默认为1min
  evaluation_interval: 15s # 更新rules文件的周期,默认为1min
  # scrape_timeout is set to the global default (10s).
# Alertmanager configuration
alerting:
  alertmanagers:
  - static_configs:
    - targets:
      # - alertmanager:9093
# Load rules once and periodically evaluate them according to the global 'evaluation_interval'.
rule_files:
  # - "first_rules.yml"
  # - "second_rules.yml"
# A scrape configuration containing exactly one endpoint to scrape:
# Here it's Prometheus itself.
scrape_configs:
  # The job name is added as a label `job=<job_name>` to any timeseries scraped from this config.
  - job_name: 'prometheus'
    # metrics_path defaults to '/metrics'
    # scheme defaults to 'http'.
    static_configs:
    - targets: ['localhost:9090']
2
3
4
5
6
7
8
9
10
11
12
13
14
15
16
17
18
19
20
21
22
23
24
## 运行
[root@prometheus-server ~]# docker run -d -p 9090:9090 --user="root" --name prometheus -v /opt/prometheus/prometheus.yml:/etc/prometheus/prometheus.yml -v /opt/prometheus/data:/prometheus prom/prometheus
2
笔记
1、--user:指定运行用户
2、需要宿主机创建prometheus.yml配置文件
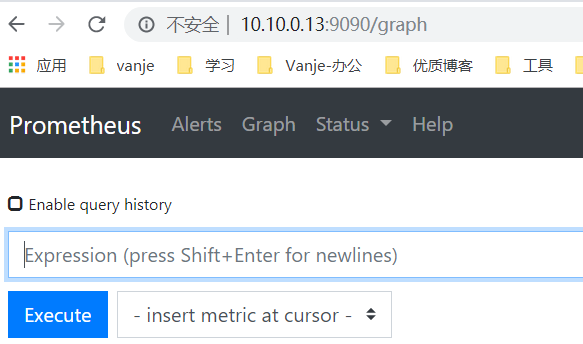
# 浏览器访问
启动后,直接浏览器访问端口9090,这样,prometheus服务就安装好了。